Skip to content
Table of Contents
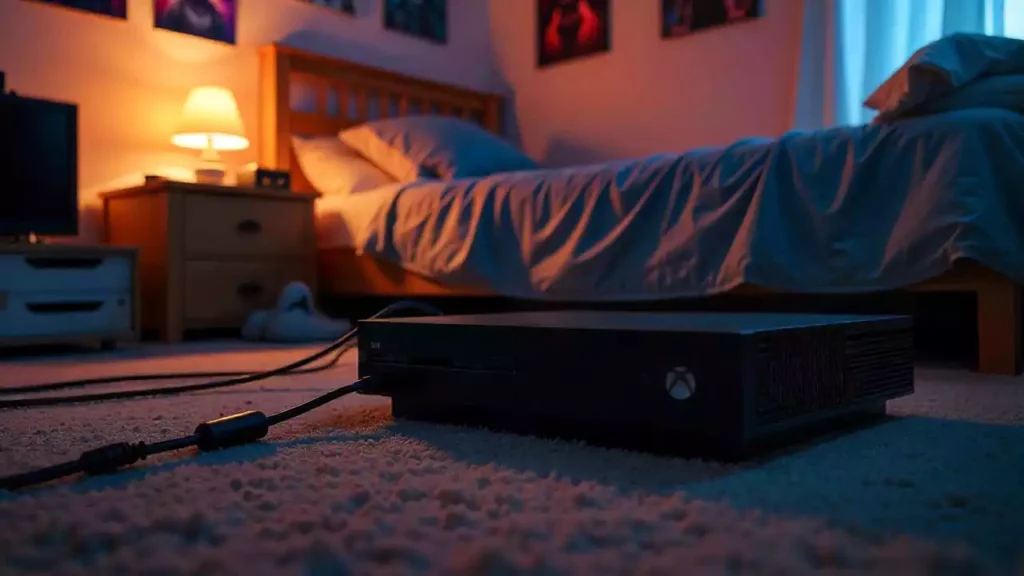
You can often fix Xbox HDMI problems at home. Start by checking the HDMI cable and both ends for damage. Try a different HDMI port on your TV. Power cycle your Xbox by unplugging it for 30 seconds. If the display stays blank, reset the console’s display settings. Many users solve HDMI issues with these steps. For damaged ports or bent pins, you may need professional help to fix Xbox HDMI problems. Always check your warranty before opening the console.
Key Takeaways
Begin fixing Xbox HDMI problems by looking at the HDMI cable and connections. Check if they are broken or loose. Try using other TV ports or a different screen. This helps you see if the problem is with your Xbox or the TV. Turn off your Xbox and unplug it for 30 seconds. This can fix small problems. Change your Xbox display settings to low resolution if the screen is blank or says no signal. Clean the HDMI port with compressed air and a soft brush. This removes dust and dirt. Use good, certified HDMI cables that work with your Xbox and TV. Make sure they support things like 4K and HDR. If the HDMI port is broken or the pins are bent, get help from a professional. This keeps your warranty safe. Take care of your HDMI port by being gentle with cables. Keep the port clean and do not unplug cables too often.
Quick Start to Fix Xbox HDMI
Check Cable and Connections
Start by inspecting your HDMI cable. Look for any visible damage, such as frayed ends or bent connectors. A damaged cable often causes signal loss or a blank screen. Unplug the HDMI cable from both your Xbox and your TV. Examine both ports for dust or debris. Use a soft brush or compressed air to clean them if needed.
Next, plug the HDMI cable back in firmly. Make sure it clicks into place on both the Xbox and the TV. Loose connections can interrupt the signal. If you have another HDMI cable, try swapping it out. Sometimes, the cable itself is the problem, not the port. This simple check can help you fix Xbox HDMI issues quickly.
Tip: Always use high-speed HDMI cables that support 4K or HDR if your Xbox and TV support these features. Lower-quality cables may not transmit the signal correctly. Read our last post for 6 factors to affect HDMI cable quality.
Test Different TV or Monitor
If your Xbox still does not display an image, try connecting it to a different TV or monitor. This step helps you find out if the problem is with your Xbox or your display. Use the same HDMI cable for this test. If the Xbox works on another screen, your original TV or monitor may have a faulty HDMI port.
If you see the same issue on multiple displays, the problem likely comes from your Xbox or the HDMI cable. This process helps you narrow down the cause and decide how to fix Xbox HDMI problems.
Note: Some TVs have multiple HDMI ports. Try each one to rule out a single bad port.
Power Cycle Console
A power cycle can solve many temporary glitches. Turn off your Xbox completely. Unplug the power cable from the back of the console. Wait at least 30 seconds. This step allows the hardware to reset fully.
Plug the power cable back in and turn on your Xbox. Check if the display returns. Power cycling clears minor errors in the system’s memory. Many users find this step helps fix Xbox HDMI issues without any tools.
Expert Insight: According to hardware repair specialists, power cycling is one of the most effective first steps for resolving HDMI signal problems.
Reset Display Settings
Sometimes your Xbox may not show a picture because of incorrect display settings. You can reset these settings to restore the video output. This step helps if you see a blank screen or if your TV says “No Signal.” Many users find this method helpful when other troubleshooting steps do not work.
How to Reset Xbox Display Settings:
- Turn off your Xbox completely. Make sure the power light is off.
- Press and hold the PowerButton more than 10s until the beep occurs.
- Listen for two startup tones. The first tone sounds right away. The second tone comes a few seconds later. Release the buttons after the second tone.
- Your Xbox will start in low-resolution mode (640×480). You should see a picture on your TV now..
After you see the Xbox home screen, go to Settings > General > TV & display options. Change the resolution to match your TV. Choose the highest resolution your TV supports for the best picture.
Why Resetting Display Settings Works:
- Sometimes, the Xbox saves display settings that do not work with your TV.
- Resetting forces the console to use a basic video mode that most TVs support.
- This step can help you fix Xbox HDMI problems caused by incompatible settings.
Common Mistakes to Avoid:
- Do not unplug the HDMI cable while resetting. Keep all cables connected.
- Make sure you hold the buttons until you hear both tones. Releasing too early may not reset the settings.
Note: If you still do not see a picture after resetting, try a different HDMI port or cable. Sometimes, the issue is not with the settings but with the hardware.
Resetting display settings is a safe and easy way to fix Xbox HDMI issues at home. You do not need special tools or technical skills. Many repair experts recommend this step before opening the console or seeking professional help.
Inspect and Identify Issues
Look for Physical Damage
Start by checking your Xbox HDMI port for any visible damage. Gently remove the HDMI cable from the port. Look closely at the port’s edges. You might see bent metal, cracks, or even missing pieces. These signs often mean the port has suffered physical damage.
- Bent or loose port:The HDMI port should feel firm. If it wiggles or feels loose, the internal connection may have broken.
- Scratches or dents:Surface damage can affect how the cable fits and works.
- Debris or dust:Sometimes, small particles block the connection. Use a soft brush to clean the area.
Tip: Never use sharp objects to clean the port. You could cause more damage.
If you spot any of these problems, you may need a professional repair. Physical damage often means the port cannot send a signal to your TV.
Use a Flashlight to Check Pins
The HDMI port contains tiny metal pins. These pins carry the video and audio signals from your Xbox to your TV. Damaged or bent pins can stop the signal.
- Grab a small flashlight or use your phone’s flashlight feature.
- Shine the light directly into the HDMI port.
- Look for pins that appear bent, pushed back, or missing.
A healthy HDMI port shows straight, evenly spaced pins. If you see any pins out of place, the port may not work correctly.
Note: If you notice bent pins, do not try to fix them with metal tools. You could break the port or cause a short circuit.
Some repair experts say that bent pins are one of the most common reasons for HDMI failure. If you find this issue, you should consider professional help.
Spot Error Messages
Your Xbox may show error messages when it cannot connect to your TV. These messages help you find the problem faster.
Common error messages include:
- “No Signal”on your TV screen
- “Resolution Not Supported”on your Xbox
- Black or flickering screenwith no sound
If you see these messages, write them down. They can help a technician diagnose the problem. Sometimes, the Xbox will also show a troubleshooting guide on the screen.
Pro Tip: Check the Xbox support website for error code explanations. You can enter the code to get step-by-step solutions.
Spotting these messages early can save you time. You will know if the issue comes from the HDMI port, the cable, or the TV itself.
DIY Fixes for Xbox HDMI
Clean HDMI Port
Dust and debris can block the connection between your Xbox and the HDMI cable. Cleaning the HDMI port is a simple way to improve the signal. You do not need special tools for this step.
How to Clean the HDMI Port:
- Turn off your Xbox and unplug it from the power source.
- Use a flashlight to look inside the HDMI port. Check for dust, lint, or small particles.
- Take a can of compressed air. Hold the nozzle a few inches from the port. Spray short bursts of air into the port. This will blow out loose debris.
- If you see stubborn dirt, use a soft-bristled brush, like a clean toothbrush. Gently brush the inside of the port. Do not use metal objects or sharp tools.
- Let the port dry for a few minutes before plugging in the HDMI cable.
Tip: Clean the HDMI port every few months. This helps prevent signal problems and keeps your Xbox working well.
Replace Cable
A faulty HDMI cable often causes display issues. You can fix Xbox HDMI problems by replacing the cable with a new one. Not all HDMI cables are the same. Some cables do not support high resolutions or fast refresh rates.
Steps to Replace the HDMI Cable:
- Unplug the old HDMI cable from both your Xbox and your TV.
- Inspect the cable for cuts, bends, or broken connectors.
- Buy a new high-speed HDMI cable. Look for cables labeled “HDMI 2.0” or higher. These support 4K and HDR features.
- Plug the new cable into your Xbox and TV. Make sure both ends fit snugly.
- Turn on your Xbox and check if the display works.
Note: Always use a certified HDMI cable. Cheap or damaged cables can cause flickering, no signal, or poor image quality.
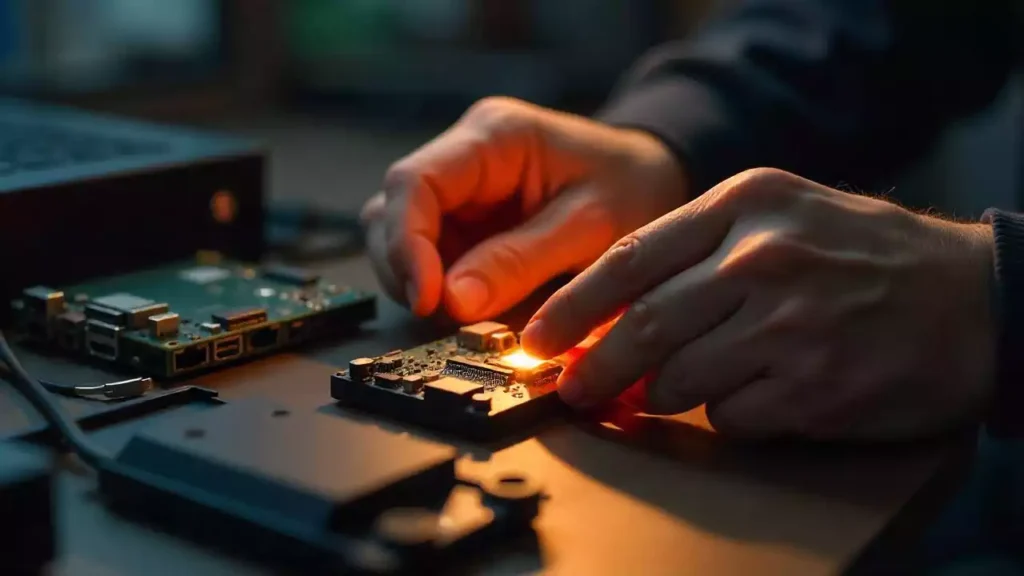
Try a Repair Kit
If cleaning and cable replacement do not fix Xbox HDMI issues, you can try a repair kit. These kits include tools and replacement parts for the HDMI port. You need steady hands and patience for this repair.
What You Need in a Repair Kit:
Tool/Part | Purpose |
Precision Screwdriver | Opens the Xbox case |
Soldering Iron | Removes and attaches HDMI port pins |
Replacement HDMI Port | Swaps out the damaged port |
Tweezers | Handles small parts |
Solder | Connects the new port to the motherboard |
How to Use a Repair Kit:
- Unplug your Xbox and place it on a clean, flat surface.
- Use the screwdriver to open the case. Keep track of all screws.
- Locate the HDMI port on the motherboard.
- Use the soldering iron to remove the damaged port. This step requires care. Too much heat can damage the board.
- Place the new HDMI port in position. Solder each pin carefully.
- Reassemble your Xbox and test the HDMI connection.
Warning: DIY soldering can void your warranty. If you do not feel confident, seek help from a professional technician.
Trying a repair kit can help you fix Xbox HDMI problems at home. Many users succeed with patience and the right tools. If you feel unsure, contact a certified repair shop.
Safety Tips
Before you start any DIY repair on your Xbox HDMI port, you need to think about safety. Working with electronics can be risky if you do not follow the right steps. Here are some important safety tips to help you avoid accidents and protect your Xbox:
- Unplug Everything: Always unplug your Xbox from the wall and remove all cables before you open the case or touch any parts inside. This step keeps you safe from electric shock.
- Work on a Clean Surface: Use a flat, clean table with good lighting. Keep drinks and food away from your workspace. Small parts can get lost easily, so use a tray or small container to hold screws.
- Use the Right Tools: Only use tools made for electronics, like precision screwdrivers and plastic prying tools. Metal tools can slip and damage the motherboard or other parts.
- Avoid Static Electricity: Static can damage sensitive parts inside your Xbox. Wear an anti-static wrist strap if you have one. If not, touch a metal object to discharge static before you start.
- Handle Parts Gently: Do not force any part or cable. If something feels stuck, check for hidden screws or clips.
- Keep Track of Screws: Xbox consoles use different screws in different places. Place each screw in a labeled spot or use a screw organizer.
Tip: If you feel unsure at any step, stop and ask for help. Watching a video guide can help you understand the process better.
Extra Tips and Common Mistakes in DIY Fixes
You can improve your chances of a successful repair by following these extra tips. Many people make simple mistakes that can cause more problems. Learn from these common errors to avoid extra costs or damage.
Extra Tips:
- Take clear photos of each step as you take your Xbox apart. These photos help you remember where each part goes when you put it back together.
- Label cables and connectors with small pieces of tape. This step makes reassembly much easier.
- Use a magnifying glass to check the HDMI port and pins. Small damage can be hard to see with the naked eye.
- Test your Xbox before closing the case fully. Plug in the HDMI cable and power to check if the repair worked.
5 Common Mistakes to Avoid:
Mistake | Why It’s a Problem |
Using too much force | Can break connectors or the motherboard |
Skipping the static discharge | May cause permanent damage to components |
Mixing up screws | Wrong screws can strip threads or not fit |
Not checking warranty status | DIY repairs can void your warranty |
Rushing the process | Increases the risk of missing steps or errors |
Note: Always check your Xbox warranty before starting any repair. If your console is still under warranty, a professional repair may be free or low-cost.
By following these tips and avoiding common mistakes, you can fix your Xbox HDMI port safely and effectively. Take your time and stay organized for the best results.
Professional HDMI Port Repair: When DIY Fails
Finding Certified Technicians
If you cannot fix Xbox HDMI problems at home, find a certified technician. Certified technicians have special training for fixing gaming consoles. They use the right tools and follow safety steps. You can find certified repair centers on the Xbox official website. You can also search for local electronics repair shops with good reviews. Always ask if the technician has worked on Xbox Series X or Series S models before. This helps you avoid mistakes that could make your console worse.
Tip: Ask if the repair center gives a warranty for their work. A warranty means the technician trusts the repair quality.
The Repair Process
Professional repair centers use careful steps to fix Xbox HDMI ports. When you pick a trusted service, you get clear steps and good updates. Here is what usually happens:
- You send your Xbox to the repair center. You pay for shipping to them, but they pay to ship it back.
- The technician checks your console for damage. If your device was opened or has software issues, the center may not take it.
- The technician removes the broken HDMI port with special tools. They solder a new port onto the motherboard. Soldering joins metal parts with melted metal.
- After the repair, the technician tests your Xbox to make sure the HDMI port works. They check for a clear picture and sound.
- The repair center usually finishes in 2-3 business days. If they cannot fix your console, they refund your money, minus shipping.
- Most professional repairs come with a 90-day warranty. If the same problem happens again, you can get it fixed for free during that time.
Customers often say they like the fast service and good repair quality. You can trust a certified technician to fix Xbox HDMI problems safely and correctly.
Cost Considerations
Professional HDMI port repair costs more than DIY fixes, but it gives you peace of mind. The price depends on your Xbox model and the repair center’s rates. Most repairs include the cost of parts, labor, and return shipping. You should also think about the cost to ship your console to the repair shop.
Some repair centers do not take consoles that were opened or fixed before. If you try to fix Xbox HDMI ports yourself and make a mistake, you might pay more for a professional to fix it later. Always check if your Xbox is still under warranty before you pay for a repair. Sometimes, the manufacturer will fix it for free.
Note: A professional repair may cost between $80 and $150, depending on where you live and your Xbox model. Always ask for a price quote before you agree to the repair.
Cost and Warranty Info
Repair Costs by Model
The price to fix an Xbox HDMI port depends on your Xbox model and the repair shop you pick. Newer consoles, like the Xbox Series X, usually cost more to fix. This is because they have newer hardware and smaller ports. Most repair shops will show you a price list before they start. You can check the table below for common prices:
Repair Service Type | Xbox Model(s) | Cost Estimate (USD) | Additional Details |
HDMI Port Replacement | Xbox Series X (newer) | Approx. $149 | Professional repair service |
HDMI Port Replacement | Xbox One | $89 – $129 | Microsoft official repair |
HDMI Port Replacement | All models | $80 – $150 (third-party) | Includes 90-day warranty from some providers |
Collection & Delivery Service | All models | $25 – $45 | Shipping and handling fees may apply |
Bench Fee (if no repair) | All models | $25 | Charged if you decline repair after diagnosis |
Repair Turnaround Time | All models | 1 hour to 3 business days | Typical repair duration |
Warranty on Repair | All models | 90 days to 6 months | Service guarantee for repairs |
Tip: Always get a written price before you agree to a repair. This helps you know the cost and avoid extra fees.
Warranty Impact
Your Xbox warranty can change if you try to fix the HDMI port yourself. If you open your Xbox and break something or make changes, you might lose your warranty. Microsoft’s warranty does not cover damage from fixing it yourself or using non-official parts. If you use a professional repair shop, especially one approved by Microsoft, your warranty stays safe.
Most professional repairs come with their own warranty, often for 90 days. For example, some shops like IFIX New York give a 90-day warranty for HDMI port repairs. If you get your Xbox fixed by Microsoft, you get a one-year hardware warranty. Using a pro repair shop also helps keep your data safe and gives you peace of mind.
Aspect | DIY Repairs Impact | Professional Repairs Impact |
Warranty Coverage | Voids warranty if you damage or modify | Maintains warranty if done by authorized service |
Warranty Duration | N/A | 1 year (Microsoft), plus 90 days (repair shop) |
Repair Cost Range | N/A | $80 – $150 (third-party), $89 – $129 (Microsoft) |
Warranty Exclusions | Physical damage, unauthorized changes | Covered if repaired by professionals |
Repair Turnaround Time | N/A | 2-10 business days |
Note: Fixing your Xbox yourself may look cheaper, but you could lose your warranty. Getting a pro repair keeps your warranty and often comes with a service promise.
Using Official Parts
Using official parts for your Xbox HDMI repair is the best choice. These parts are made to fit and work well with your Xbox. Official parts meet Microsoft’s standards. They help your Xbox last longer and stop new problems from happening. Many repair shops use real parts, which helps keep your warranty safe.
If you use fake or cheap parts, you might get bad video or loose cables. These parts can also make your Xbox fail Microsoft’s warranty checks. Always ask your repair shop if they use real or certified parts.
- Benefits of using official parts:
- Reliable performance and compatibility
- Maintains warranty coverage
- Reduces risk of future HDMI problems
🛠️ Pro Tip: Pick repair shops that say they use real Xbox parts. This keeps your Xbox and your warranty safe.
Prevent Future HDMI Problems
Handle Cables Safely
You can prevent HDMI port problems by handling your cables with care. Always grip the HDMI connector, not the cable itself, when you plug or unplug it. Pulling on the cable can loosen the connection or damage the port. Make sure the cable lines up straight with the port before you insert it. Forcing the cable at an angle can bend the pins inside the port.
Try to avoid moving your Xbox while the HDMI cable is connected. Sudden movements can put stress on the port and cause it to loosen over time. If you need to move your console, disconnect all cables first. Use cable management tools, like clips or ties, to keep your cables organized and prevent tangling. This reduces the risk of accidental pulls.
Tip: Use HDMI cables that are the right length for your setup. Extra-long cables can get caught or pulled more easily.
Keep Ports Clean
Dust and debris can build up in your HDMI port and cause connection issues. You should check the port every few months. Use a flashlight to look inside the port for dust or lint. If you see any, use a can of compressed air to blow it out. Hold the can upright and spray short bursts to avoid moisture buildup.
Never use metal objects or sharp tools to clean the port. These can scratch the contacts or push debris further inside. If you notice stubborn dirt, use a soft-bristled brush, like a clean toothbrush, to gently sweep it away. Make sure your Xbox is turned off and unplugged before you clean the port.
Note: Keeping the area around your Xbox clean also helps reduce dust buildup inside the ports.
Avoid Common Mistakes
Many HDMI port problems happen because of simple mistakes. You can avoid these issues by following a few easy rules:
- Do not force the HDMI cable into the port. If it does not fit, check for bent pins or debris.
- Avoid using cheap or damaged cables. Low-quality cables can cause signal loss or even damage the port.
- Do not leave your Xbox in a place where cables can be tripped over or pulled. This can yank the cable out and harm the port.
- Check your cables and ports regularly for signs of wear or damage. Replace any cables that look frayed or bent.
Here is a quick table to help you remember what to avoid:
Mistake | What Can Happen |
Forcing the cable | Bent pins, broken port |
Using damaged cables | Poor signal, port damage |
Ignoring dust buildup | Connection problems |
Moving Xbox with cables plugged | Loose or broken HDMI port |
Pro Tip: Taking a few minutes to check your cables and ports can save you time and money in the long run. Preventing damage is easier than trying to fix Xbox HDMI issues later.
How to protect your HDMI port from future damage
You can keep your Xbox HDMI port working for years if you follow a few smart habits. Many gamers overlook these steps, but they make a big difference. Here are the best ways to protect your HDMI port from future damage:
1. Use Quality Cables and Accessories
Choose certified HDMI cables that match your Xbox’s specs. High-quality cables fit better and last longer. Cheap or off-brand cables often have weak connectors. These can bend or break the port over time. Look for cables labeled “HDMI 2.0” or higher. These support 4K and HDR features.
Tip: Replace any cable that feels loose or shows wear. A snug fit helps prevent signal loss and physical damage.
2. Support the Cable
Heavy or long HDMI cables can pull down on the port. This stress can loosen the connection or bend the pins inside. You can use cable clips or ties to secure the cable to your TV stand or wall. This support takes the weight off the port.
3. Avoid Frequent Plugging and Unplugging
Each time you insert or remove the HDMI cable, you risk wearing out the port. Try to set up your Xbox in a spot where you do not need to move it often. If you use your Xbox with different TVs, consider using an HDMI switch. This device lets you change connections without unplugging the cable from your Xbox.
4. Keep the Area Clean and Dry
Dust, pet hair, and moisture can all harm your HDMI port. Clean the area around your Xbox regularly. Use a soft, dry cloth to wipe down surfaces. If you live in a humid place, keep your Xbox in a dry room. Moisture can cause corrosion on the metal contacts inside the port.
5. Store Your Xbox Properly
If you need to store your Xbox for a while, unplug all cables first. Cover the console with a dust cover or a clean cloth. Store it in a cool, dry place away from direct sunlight. This prevents dust buildup and protects the ports from accidental bumps.
6. Inspect Regularly
Check your HDMI port and cable every few months. Look for bent pins, dust, or loose connections. Early signs of wear let you fix small problems before they become big repairs.
Prevention Tip | Why It Matters |
Use quality cables | Reduces risk of loose or bent ports |
Support the cable | Prevents stress on the HDMI connection |
Limit unplugging | Extends port lifespan |
Keep area clean/dry | Stops dust and corrosion |
Store properly | Avoids accidental damage |
Inspect regularly | Catches issues early |
Expert Advice: Console repair specialists say that most HDMI port failures come from cable stress or dust buildup. Simple habits can save you expensive repairs.
By following these steps, you protect your Xbox HDMI port and enjoy smooth gaming for years. Prevention always costs less than repair.
How to Contact Xbox Support

How to Get Help
If you cannot fix your Xbox HDMI port at home, you should contact Xbox Support. Xbox Support offers several ways to get help. You can choose the method that works best for you.
- Online Support Portal: Visit the Xbox Support website. You can find step-by-step guides, troubleshooting tools, and live chat options. The website helps you solve many problems without waiting for a call.
- Live Chat: Use the live chat feature for quick answers. You will chat with a support agent who can guide you through solutions or help you start a repair request.
- Phone Support: Call Xbox Support if you prefer to speak with someone. The phone number for your region appears on the support website. Phone support helps with urgent issues or if you need to explain your problem in detail.
- Request a Repair: If your HDMI port needs professional repair, you can start a repair order online. The support portal will guide you through the process. You will print a shipping label and send your Xbox to an authorized service center.
Tip: Use your Microsoft account to sign in before you contact support. This step helps the agent find your device details faster.
Xbox Support agents know how to handle HDMI port issues. They can check your warranty, suggest solutions, and help you set up a repair if needed.
What to Prepare
Before you contact Xbox Support, you should gather some important information. Having these details ready will make your support session faster and easier.
What to Prepare | Why It Matters |
Xbox Serial Number | Identifies your exact console model |
Proof of Purchase | Confirms warranty status |
Description of the Issue | Helps the agent understand your HDMI problem |
Troubleshooting Steps Tried | Shows what you have already done |
Error Messages or Codes | Gives clues for faster diagnosis |
Photos (if possible) | Shows physical damage or error screens |
- Find your serial number: Look on the back or bottom of your Xbox. You can also find it in the console’s settings menu under System > Console info.
- Write down what you see: Note any error messages, blinking lights, or screen problems. Be ready to explain what happens when you connect your Xbox to your TV.
- List your steps: Tell the agent which troubleshooting steps you have tried. This helps avoid repeating the same solutions.
- Prepare your proof of purchase: If your Xbox is under warranty, you may need to upload a receipt or invoice.
Note: If you see physical damage, take clear photos. You can upload these during your support request. Photos help the technician understand the problem.
By preparing this information, you help Xbox Support solve your HDMI issue quickly. You also make the repair process smoother if you need to send your console in.
Conclusion
Most HDMI port problems can be fixed with simple steps. First, check your cables to make sure they work. Clean the HDMI port to remove any dust or dirt. Try resetting the display settings if the screen is still blank. If these steps do not help, ask a certified technician for help. Always look at your warranty and repair costs before opening your Xbox. Many people fix Xbox HDMI issues at home, but experts can help if you need them.
FAQ
What are the signs of a damaged Xbox HDMI port?
You might see a blank screen, flickering images, or “No Signal” messages. Sometimes, the HDMI cable feels loose or does not fit snugly. Bent pins inside the port also signal damage.
Can I fix a bent HDMI pin myself?
You should not try to fix bent pins with metal tools. This can break the port or cause a short circuit. Professional technicians use special tools and skills for this repair.
Will repairing the HDMI port erase my game data?
Repairing the HDMI port does not erase your saved games or data. Your files stay safe on the hard drive. Always back up important data before any repair for extra safety.
How long does professional HDMI port repair take?
Most repair shops finish HDMI port repairs in one to three business days. Some offer same-day service. Shipping times may add extra days if you mail your Xbox.
Does using a third-party HDMI cable affect my Xbox?
Using a certified high-speed HDMI cable works well. Cheap or unbranded cables may cause poor video quality or connection issues. Always choose cables labeled “HDMI 2.0” or higher for best results.
What should I do if my Xbox is still under warranty?
Contact Xbox Support before trying any repairs. Opening your Xbox or using non-official parts can void your warranty. Microsoft may repair your console for free if it is still covered.
How much does it cost to replace an Xbox HDMI port?
Repair costs range from $80 to $150, depending on your Xbox model and the repair shop. Official Microsoft repairs may cost more but protect your warranty. Always ask for a price quote first.
Can dust in the HDMI port cause problems?
Yes, dust or debris can block the connection and cause signal loss. Clean the port with compressed air or a soft brush. Never use metal objects, as they can damage the port.